Export Overview
Exporting data is straightforward and efficient. To begin, select the entity you want to export, choose the file type, and specify the export destination. Then configure the mapping, apply any filters you need, and run the export.
If exported data looks incomplete or the app has connectivity issues, check Troubleshooting.
Step 1: Configure Your Export Profile
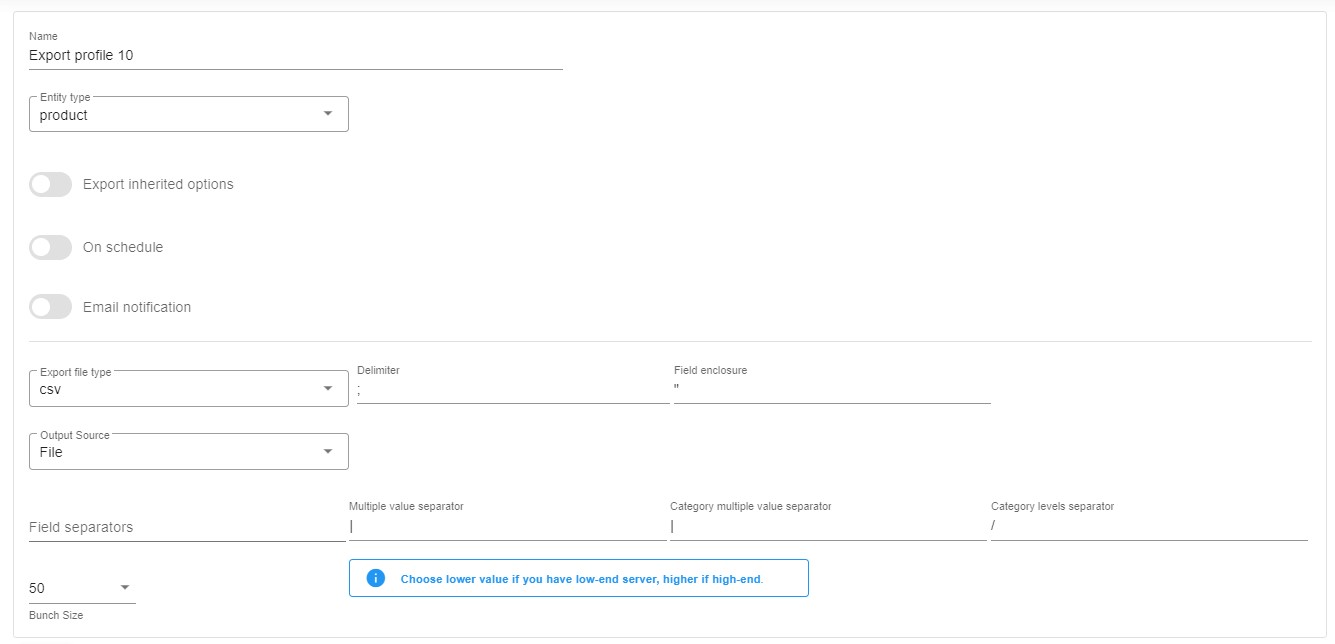
Section titled “Step 1: Configure Your Export Profile”Go to Extensions → Improved Import, Export & Mass Actions → Product Export and click the “New Profile” button. The “Configure export” screen displays:
-
Type your profile’s name;
-
Select an entity you want to export – Products, Customers, or Orders; In the case of Orders, you can export the latest modified or the latest created orders by selecting the corresponding option.

-
Enable/disable the export of inherited options. If a variant has a value, it will be exported; otherwise, the parent value will be used.
-
Configure a schedule of updates;
-
Configure email notifications;
-
Select your file format. The app lets you export CSV, XML, and XLSX files or Google Sheets spreadsheets;
-
Next, choose your export destination: FTP, Google Drive, Google Sheets, or file download;
-
Specify separators;
-
Choose a batch size for your file export: a lower value is required for a low-end server.